How to buy – Follow the simple and clear guide designed for you
Getting started with MetaMask
What is MetaMask?
Public blockchains like Ethereum are the next evolution of Internet databases, and MetaMask is the next evolution of the browser.
MetaMask is a web browser extension and mobile app that allows you to manage your Ethereum private keys. By doing so, it serves as a wallet for Ether and other tokens, and allows you to interact with decentralized applications, or dapps. Unlike some wallets, MetaMask keeps no information on you: not your email address, not your password, and not your Secret Recovery Phrase or other private keys. You retain all power over your crypto-identity.
Video Tutorial: Create a MetaMask Wallet
Tutorial: Create a MetaMask Wallet
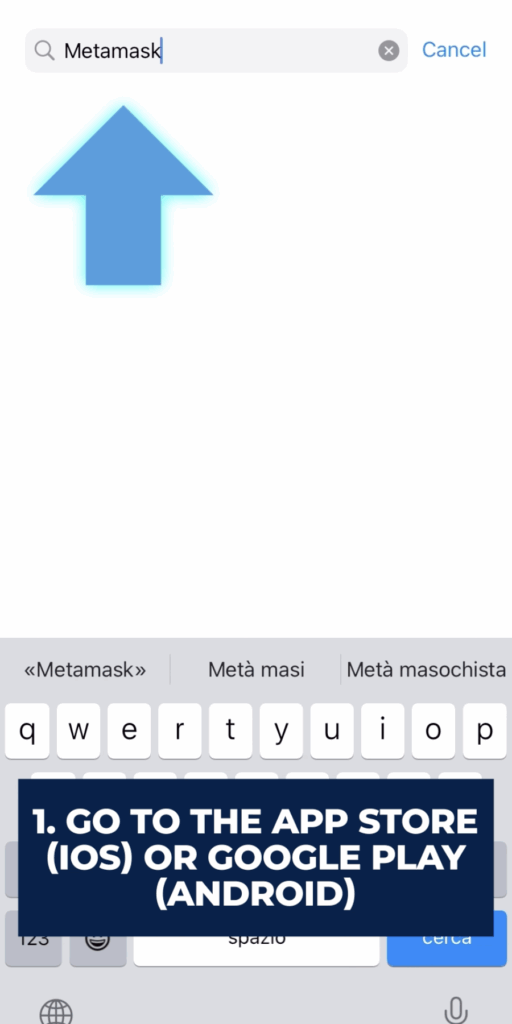
Step 1: Download the MetaMask App
Go to the App Store (iOS) or Google Play Store (Android).
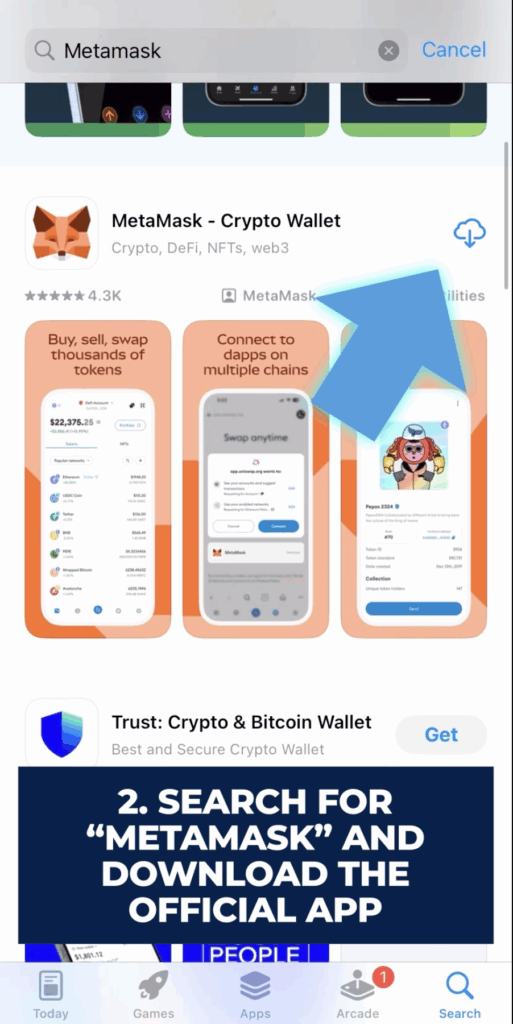
Search for “MetaMask” and download the official app. Ensure the developer is ConsenSys to avoid fake apps.
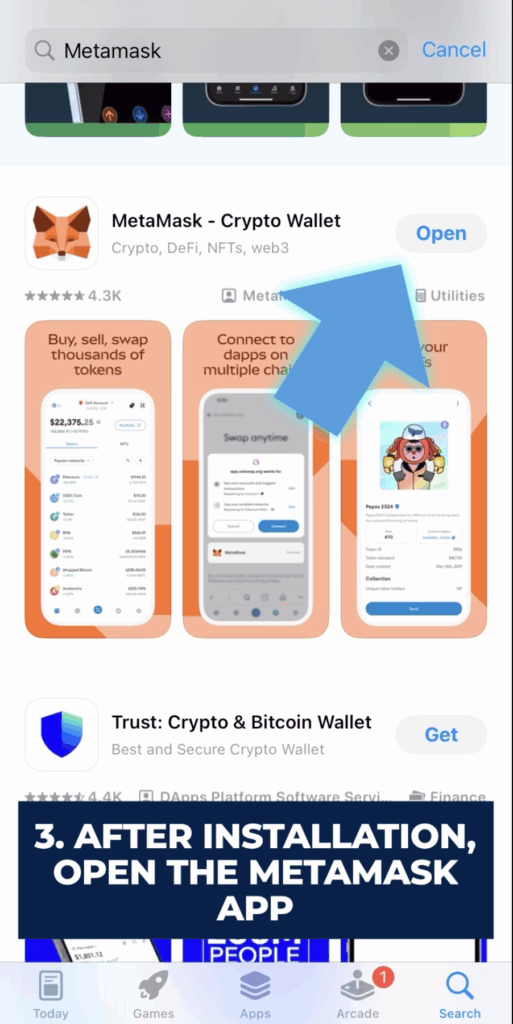
Step 2: Open the App
After installation, open the MetaMask app.
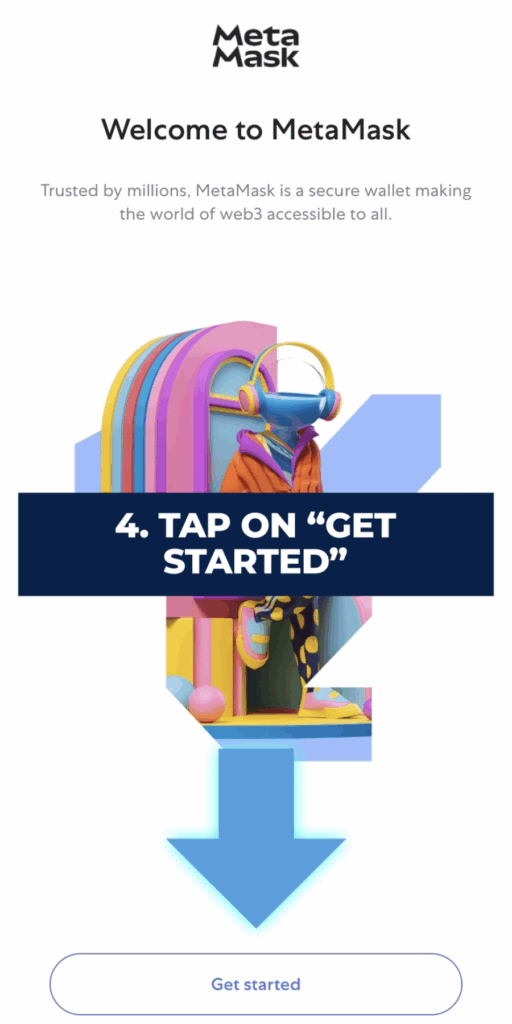
Tap on “Get Started.”
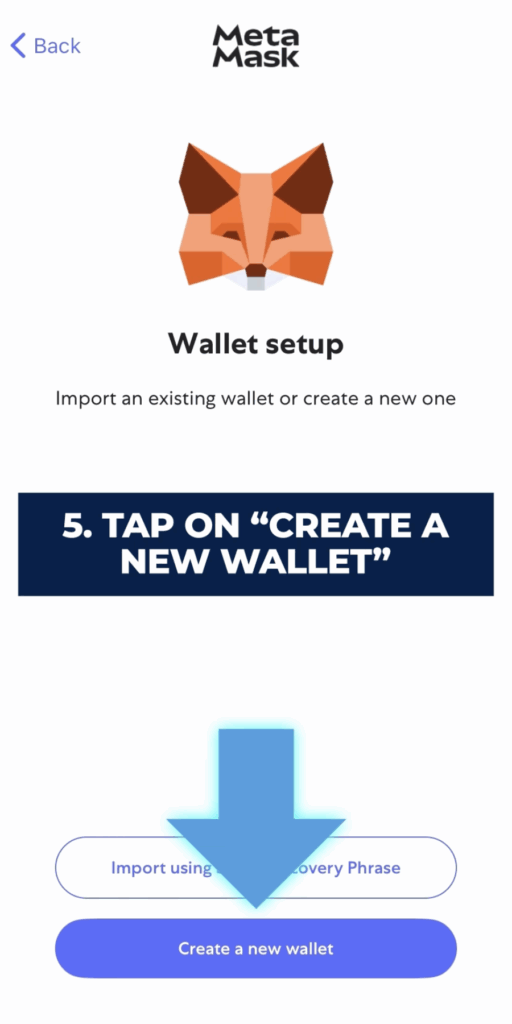
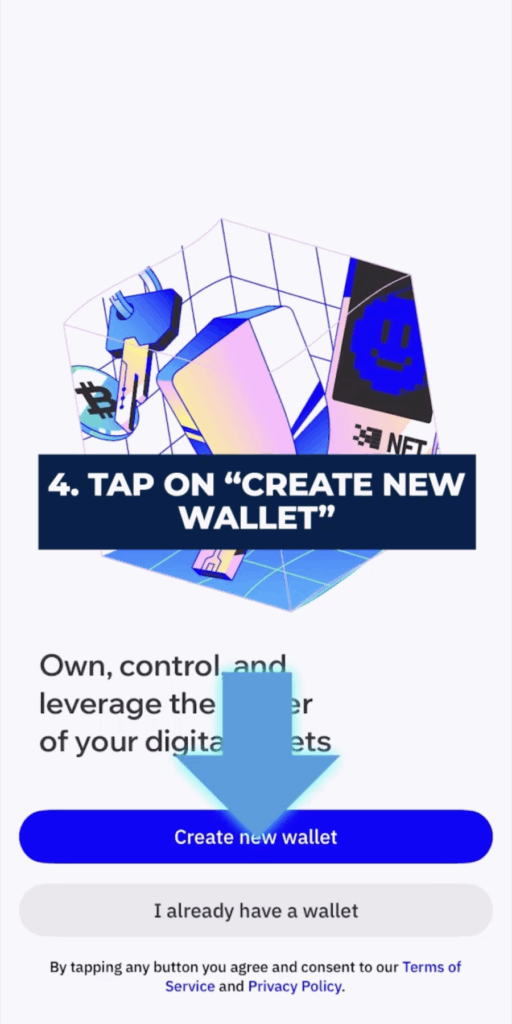
Step 3: Create a New Wallet
Tap “Create a Wallet.”
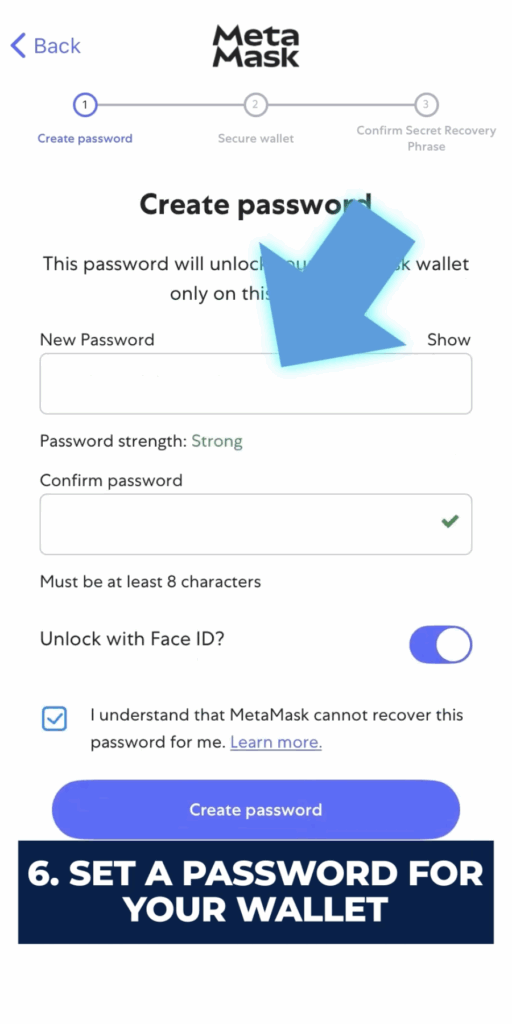
Set a password for your wallet. This will be used to unlock the app.
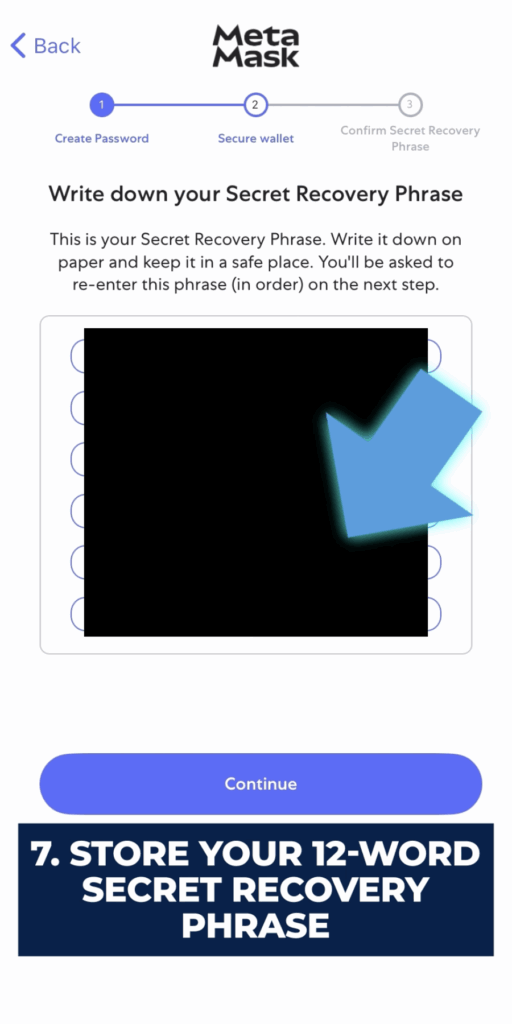
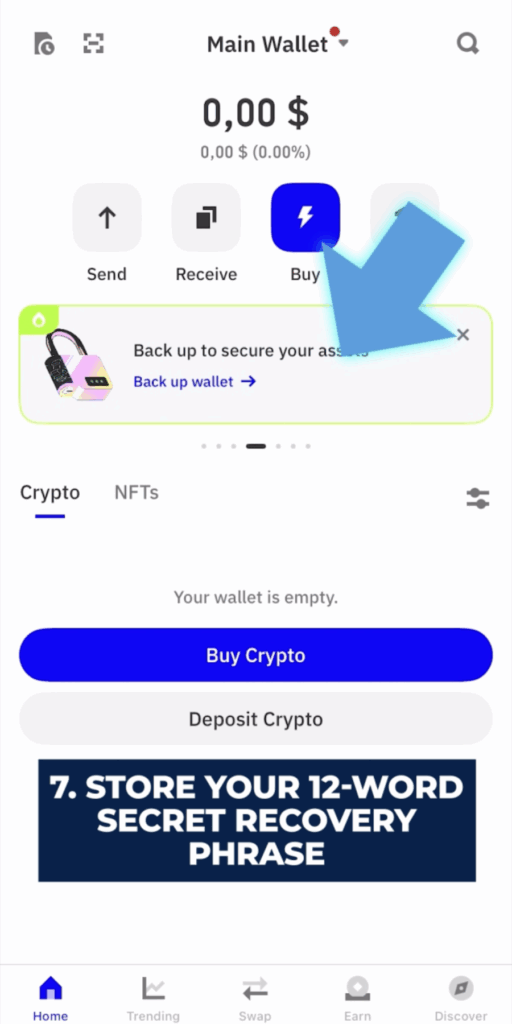
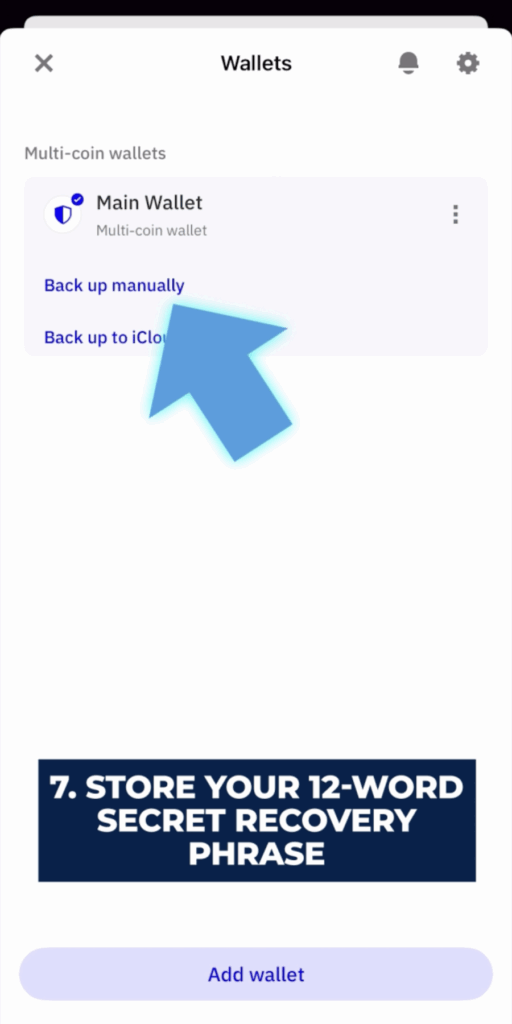
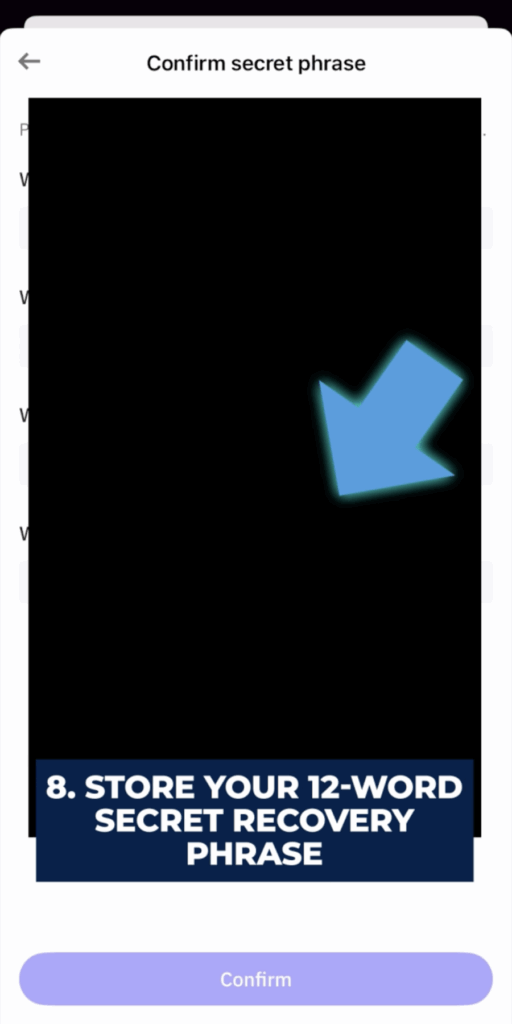
Step 4: Backup Your Secret Recovery Phrase
The app will generate your 12-word Secret Recovery Phrase.
Write it down and store it securely offline. This phrase is critical for recovering your wallet.
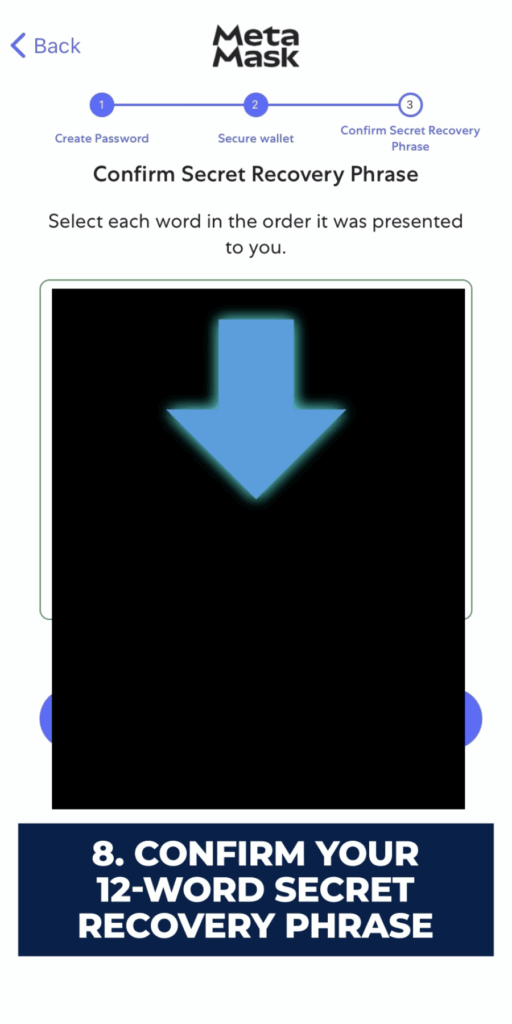
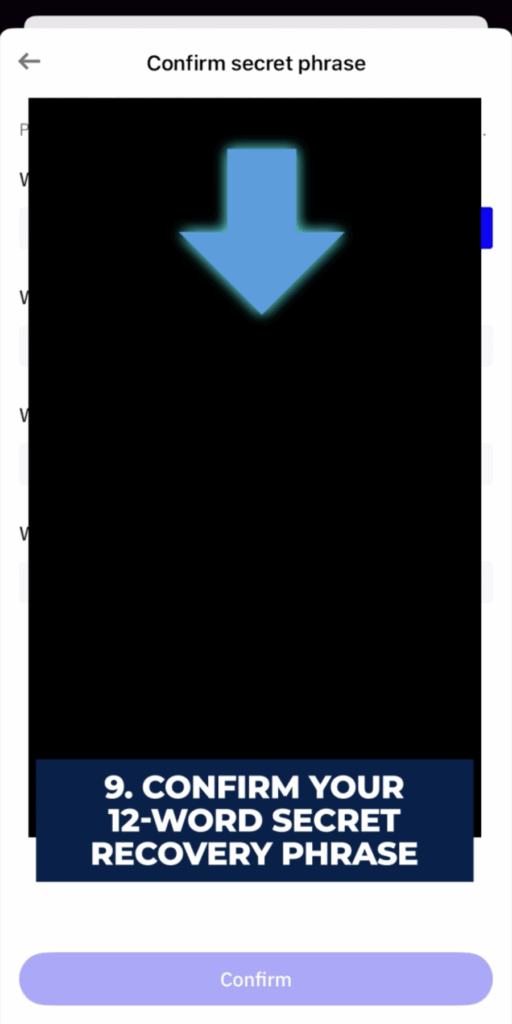
Confirm the phrase by selecting the words in the correct order.
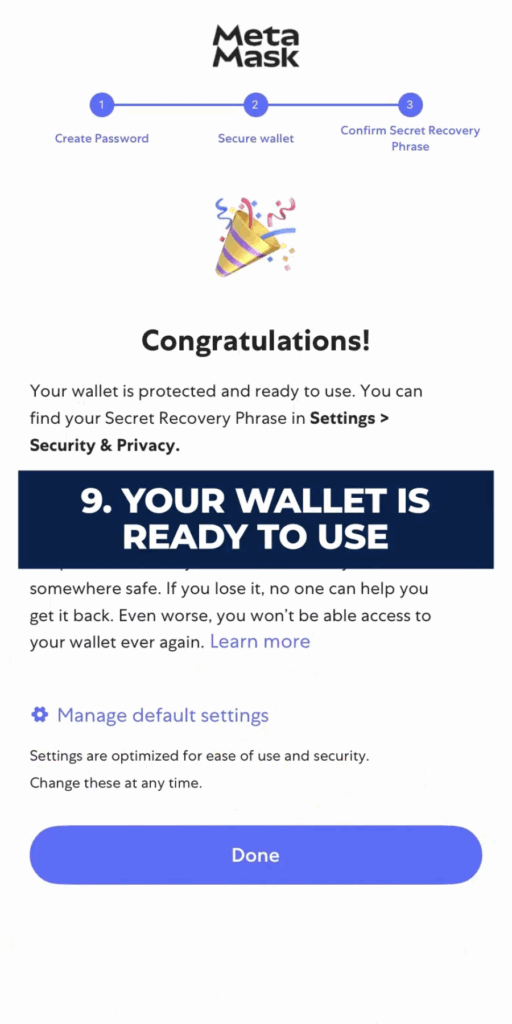
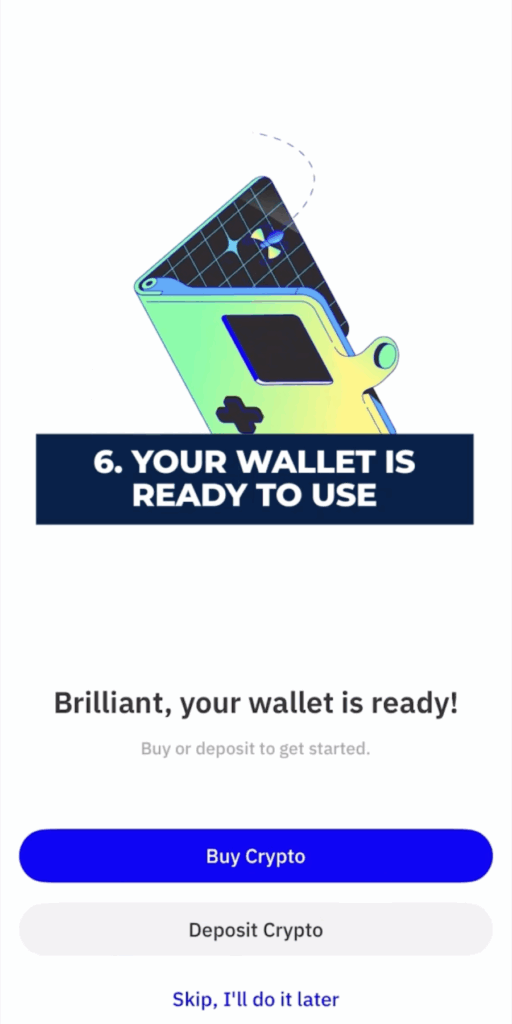
Step 5: Wallet Setup Complete
Once verified, your wallet is ready to use.
You can now explore cryptocurrencies, send and receive tokens, or connect to dApps directly from your mobile device.
Important Tips for Beginners:
Always double-check the website or app to ensure you are using the official MetaMask platform.
Never share your Secret Recovery Phrase with anyone.
Consider using hardware wallets for additional security if you manage large amounts of cryptocurrency.
With your MetaMask wallet set up, you’re ready to start exploring the world of blockchain and decentralized applications!
Video tutorial:
How to Set Up the Polygon (MATIC) Network and Add Found on MetaMask
Tutorial:
How to Set Up the Polygon (MATIC) Network and Add Found on MetaMask
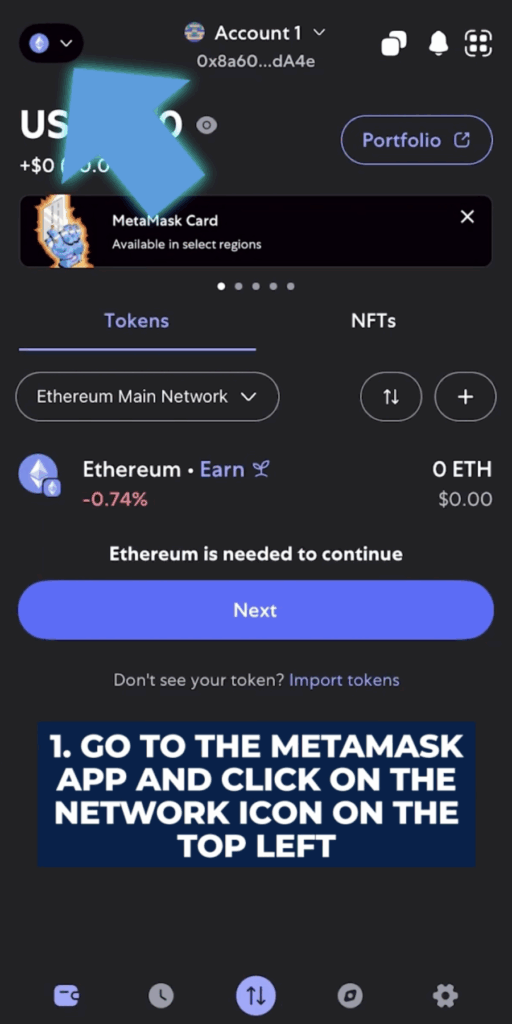
Step 1: Switch to Polygon Network
Go to the MetaMask app. In the top-left section, check or set the Polygon Matic network.
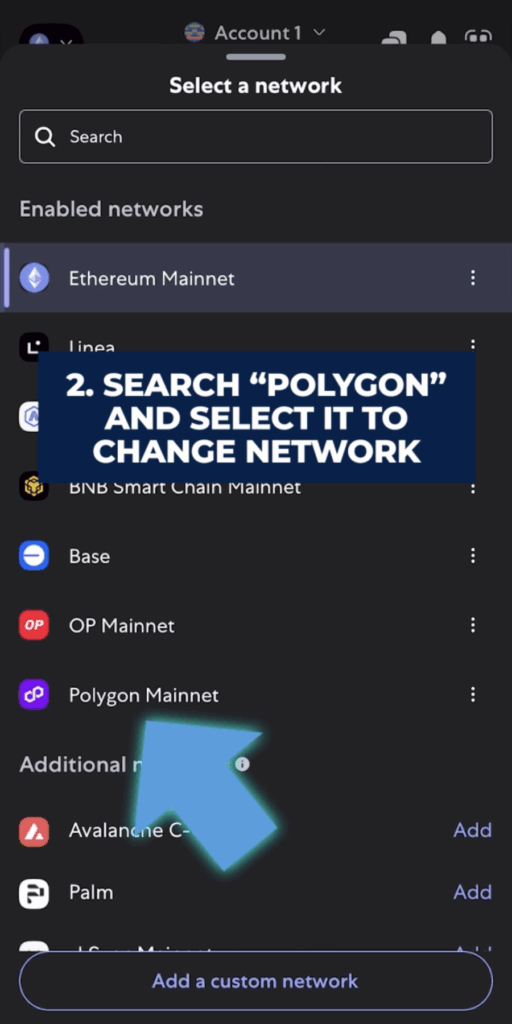
Search for “Polygon” and select it to change network.
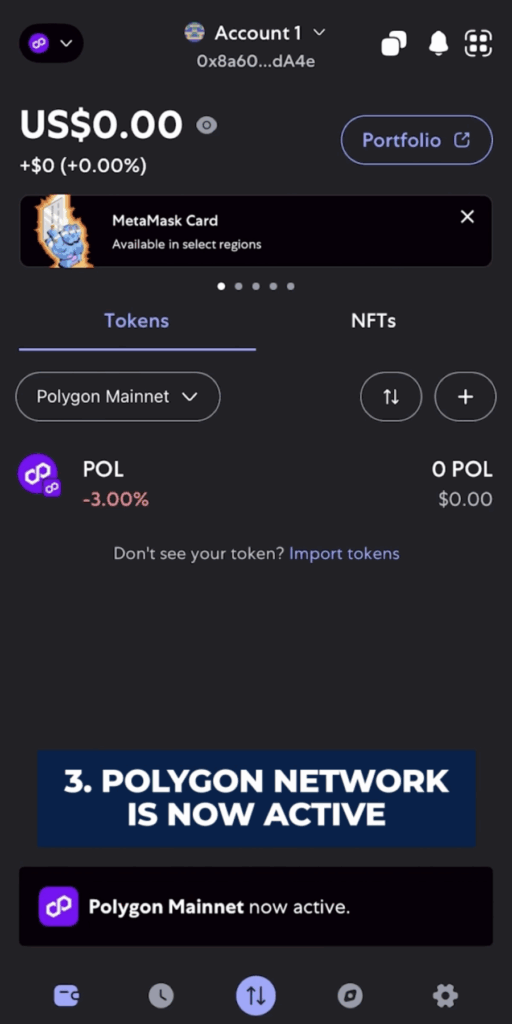
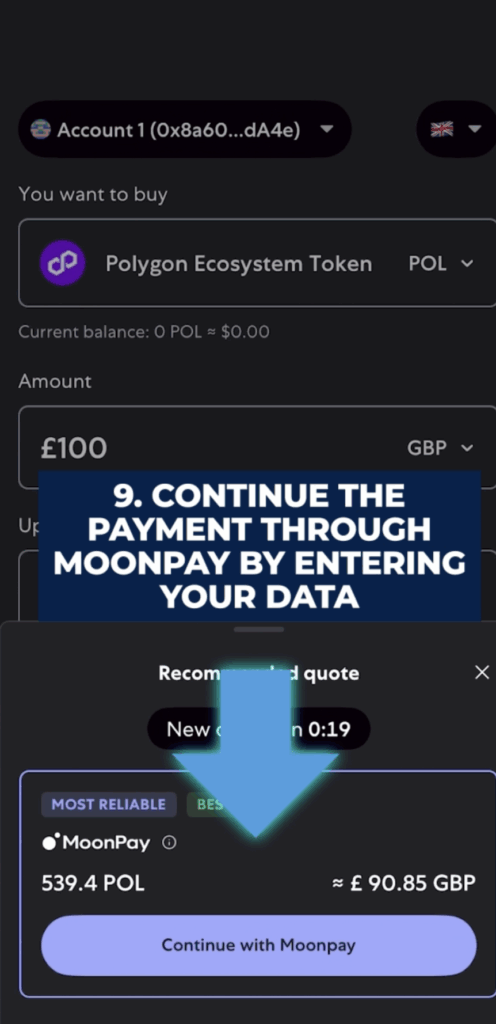
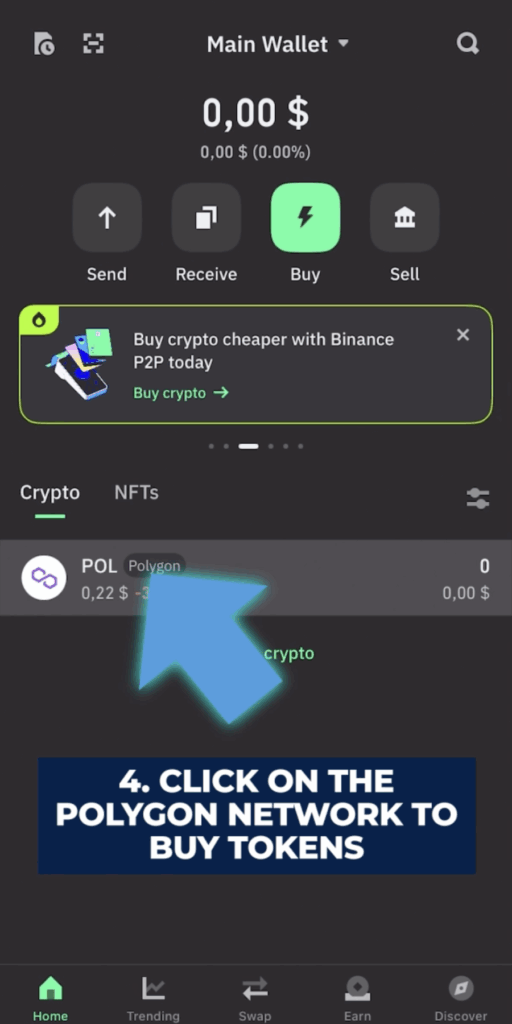
Step 2: Buy Polygon Tokens
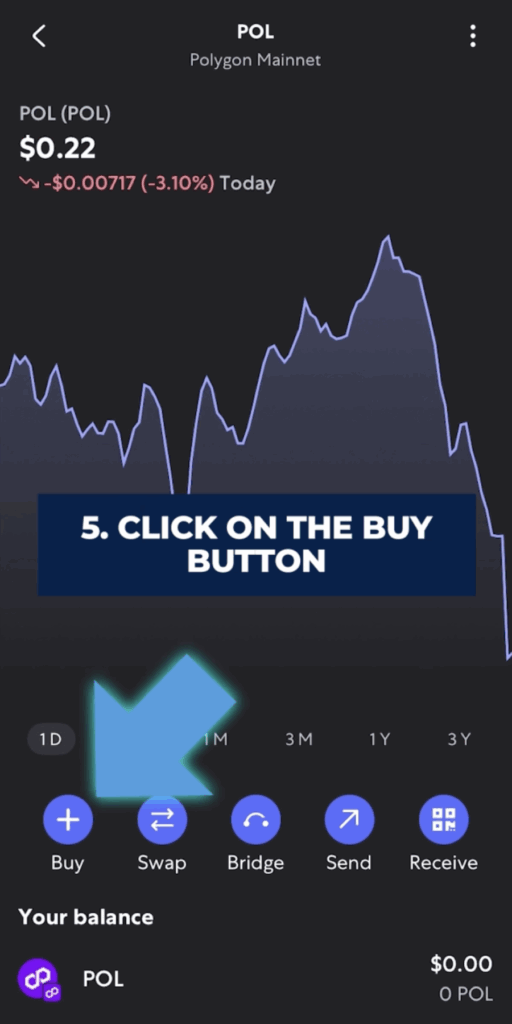
Click on the “POL” icon under the Polygon Mainnet label.
Click on the “Buy” section.
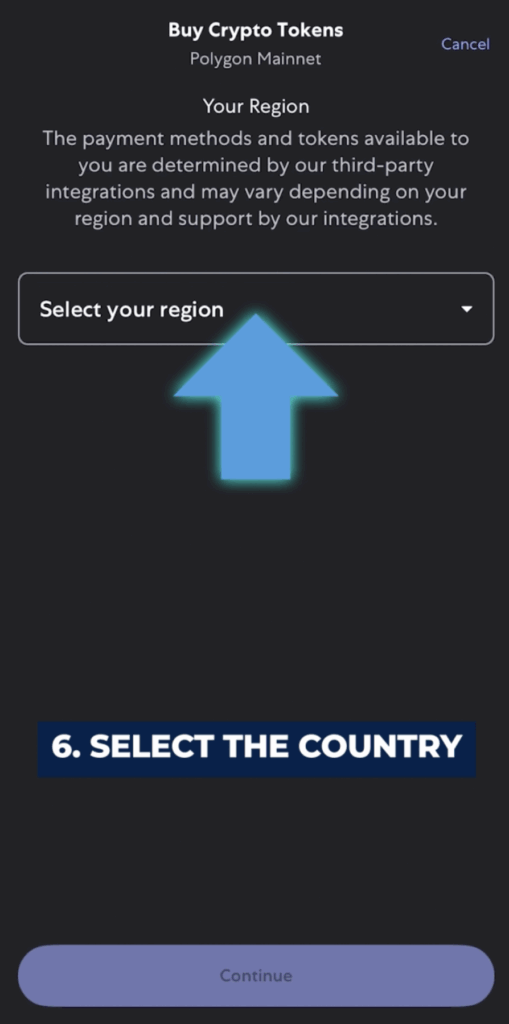
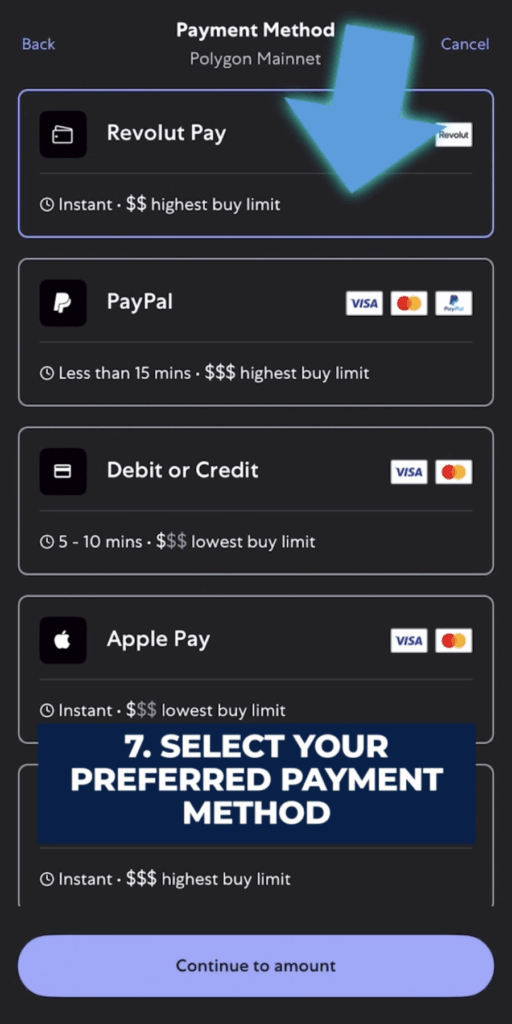
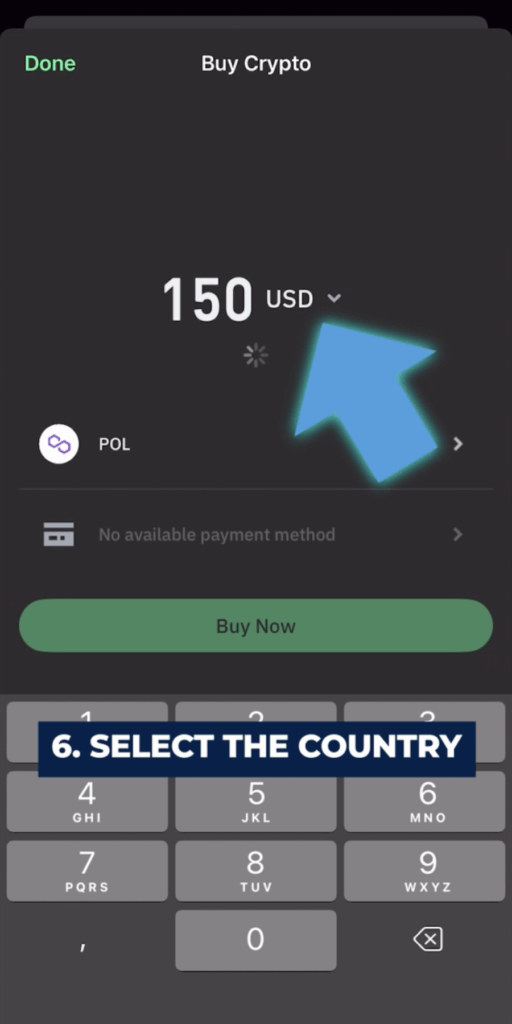
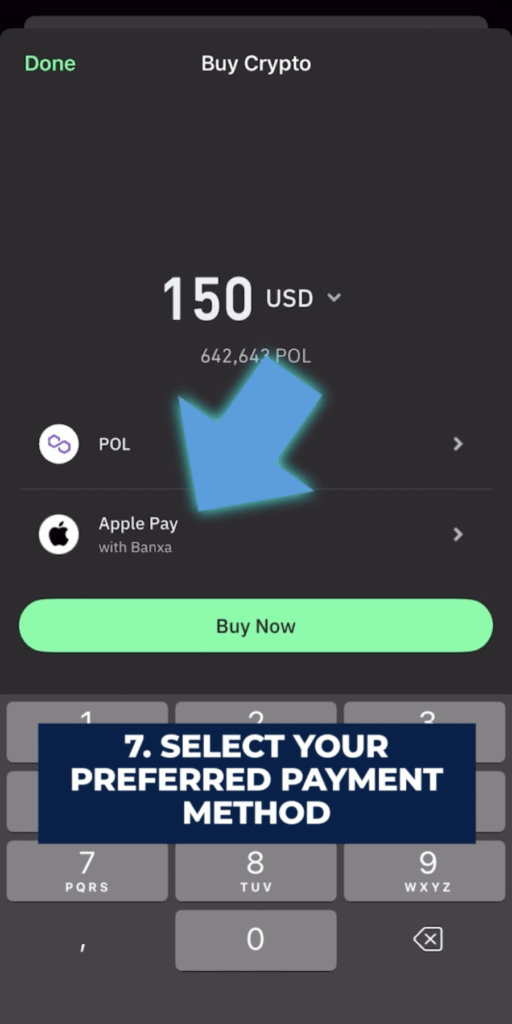
Enter your country of residence and choose your payment method.
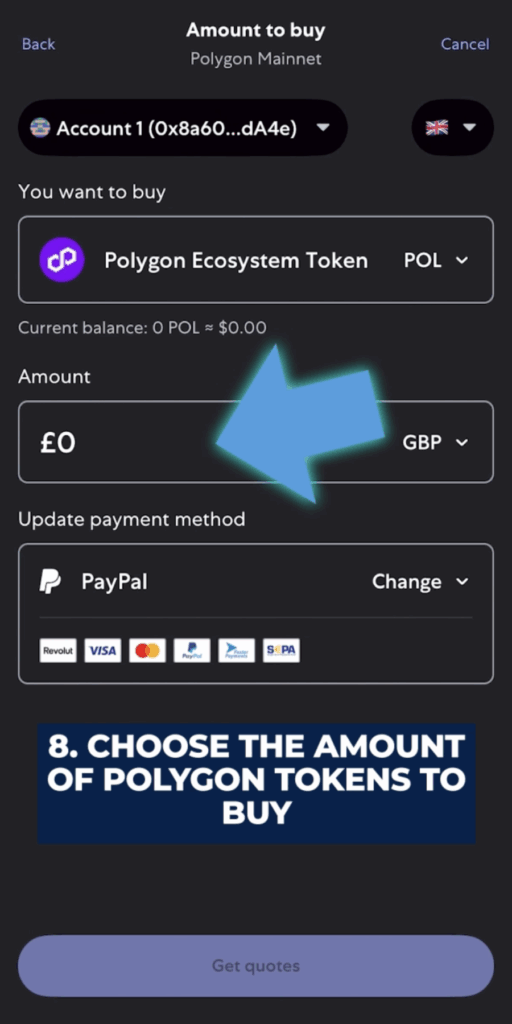
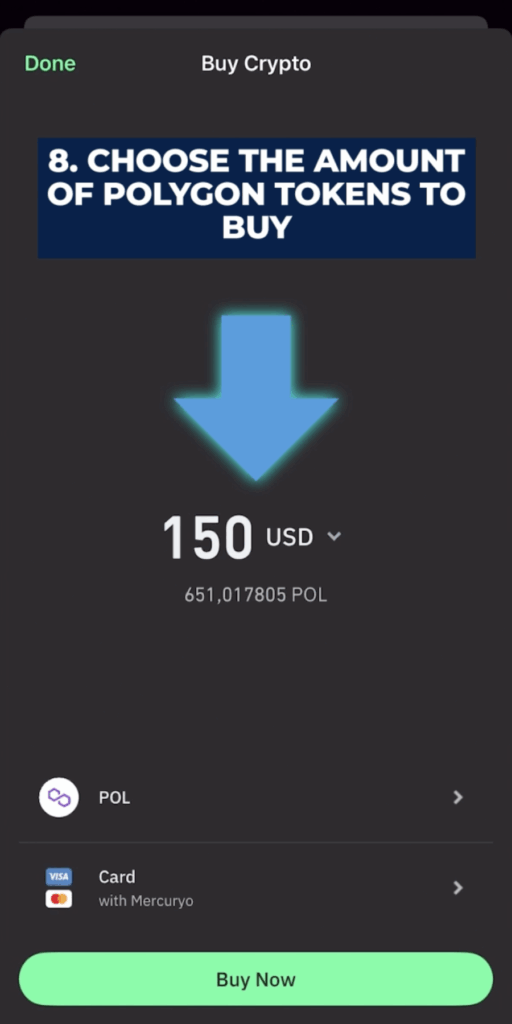
Enter the amount you want to convert into POL and purchase the token at the current market price.
If everything went smoothly, you will find the balance in the main wallet section with your amount in POL.
Tutorial - Trust Wallet
Getting started with Trust Wallet
What is Trust Wallet?
Public blockchains like Ethereum are the next evolution of Internet databases, and MetaMask is the next evolution of the browser.
MetaMask is a web browser extension and mobile app that allows you to manage your Ethereum private keys. By doing so, it serves as a wallet for Ether and other tokens, and allows you to interact with decentralized applications, or dapps. Unlike some wallets, MetaMask keeps no information on you: not your email address, not your password, and not your Secret Recovery Phrase or other private keys. You retain all power over your crypto-identity.
Video Tutorial: Create a Wallet in Trust Wallet
Tutorial: Create a Wallet in Trust Wallet
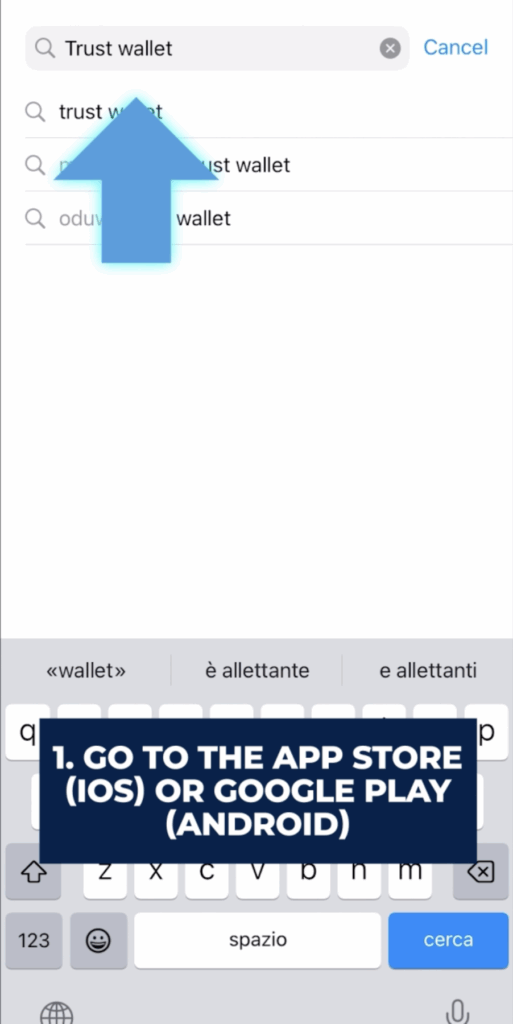
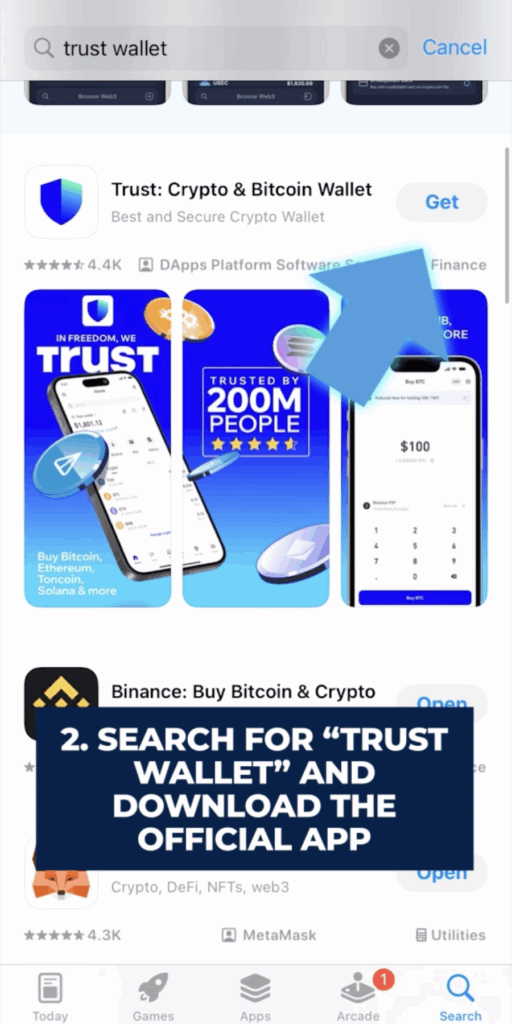
Step 1: Download the Trust Wallet App
Go to the App Store (iOS) or Google Play Store (Android).
Search for “MetaMask” and download the official app. Ensure the developer is ConsenSys to avoid fake apps.
step: aaaaaaa
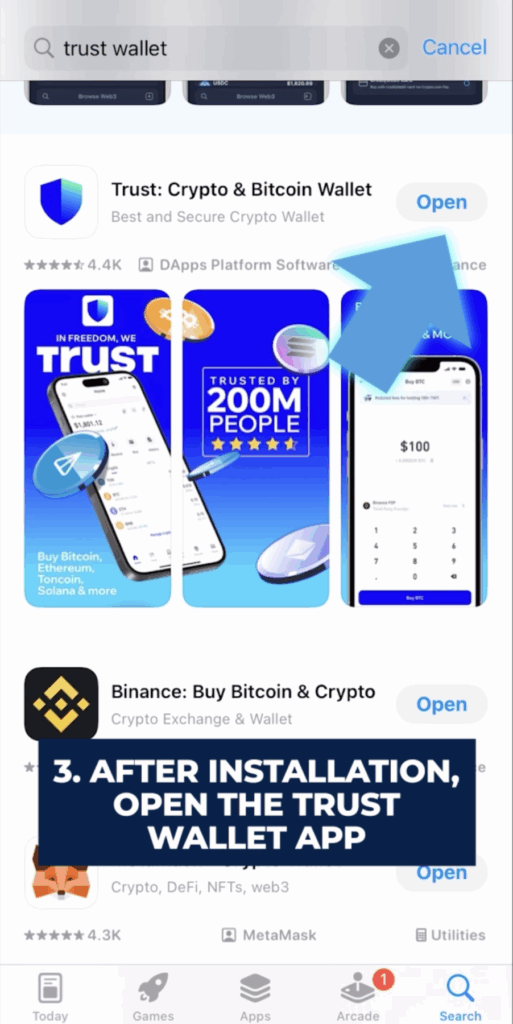
Open the app and tap on “Create a New Wallet.”
Agree to the terms of service and set a security PIN for your wallet.
Now your wallet is set up and ready to use.
Write down the 12-word recovery phrase provided. This is essential for recovering your wallet if you lose access. Store it securely and offline.
Confirm the recovery phrase by selecting the words in the correct sequence.
Once confirmed, your wallet is set up and ready to use. You can now store, send, and receive cryptocurrencies directly from your mobile device.
step: aaaaaaa
Before using your wallet set the 12-word recovery phrase. This is essential for recovering your wallet if you lose access. Store it securely and offline.
Confirm the recovery phrase by selecting the words in the correct sequence.
Once confirmed, your wallet is set up and ready to use. You can now store, send, and receive cryptocurrencies directly from your mobile device.
Important Tips for Beginners
Never share your recovery phrase or PIN with anyone.
Avoid storing your recovery phrase digitally to minimize the risk of hacking.
Double-check official sources when downloading Trust Wallet to avoid phishing scams.
Explore the app’s features to familiarize yourself with its functionalities, such as decentralized exchanges and staking options.
Video tutorial:
How to Set Up the Polygon (MATIC) Network and Add Found on Trust Wallet
Tutorial:
How to Set Up the Polygon (MATIC) Network and Add Found on Trust Wallet
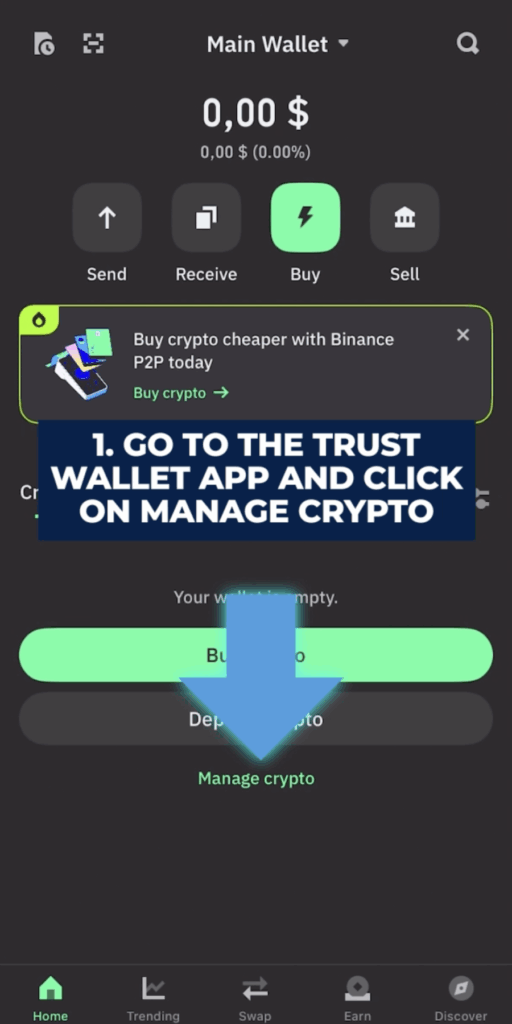
Step 1: Switch to Polygon Network
Go to the Trust Wallet app. In the top-left section, check or set the Polygon Matic network.
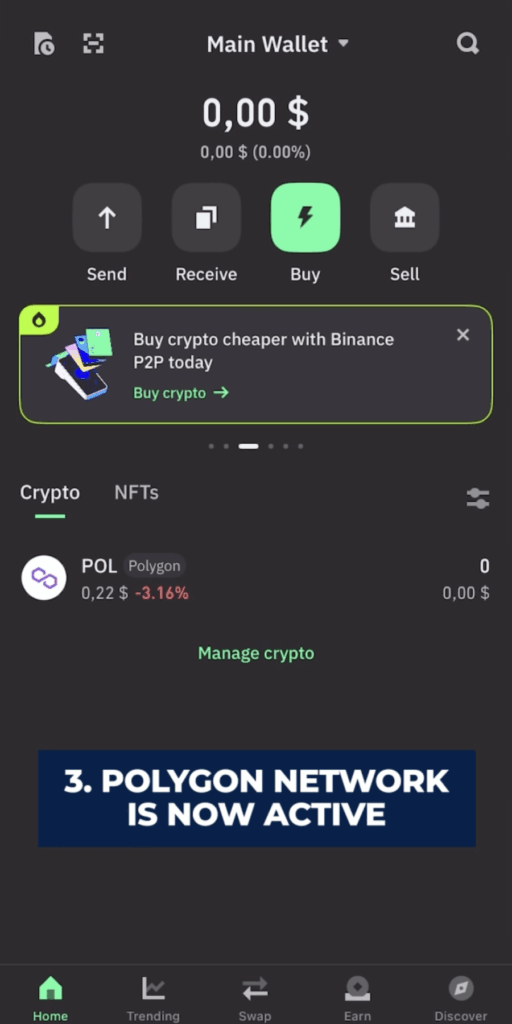
Search for “Polygon” and activate the network.
Step 2: Buy Polygon Tokens
Click on the “POL” icon under the Polygon Mainnet label.
Click on the “Buy Pol” button.
Choose your country and choose your payment method.
Enter the amount you want to convert into POL and purchase the token at the current market price.
If everything went smoothly, you’ll find your POL at the current market price in the Home section of your Wallet.
Connect the Wallet to OpenSea
How to Connect your Digital Wallet with Polygon Matic Blockchain
Connect Your Wallet
On the OpenSea homepage, click the “Wallet” icon in the top-right corner.
Choose your wallet provider from the list (e.g., MetaMask, WalletConnect, or Coinbase Wallet).
A pop-up will appear from your wallet asking for permission to connect. Confirm the connection.
Explore NFTs
Once your wallet is connected, you can browse through the various NFT collections available on OpenSea.
Use the search bar, filters, and categories to find an NFT that interests you “Thegearaura”
Buy an NFT
Click on the NFT you want to purchase to open its details page.
If the NFT is listed with a “Buy Now” price, click the “Buy Now” button. For auctions, you’ll need to place a bid instead.
Review the transaction details and confirm your purchase. Your wallet will prompt you to approve the transaction and pay the gas fees (network costs).
Check Your Wallet
After the transaction is complete, the NFT will appear in your OpenSea account under the “Collected” tab.
You can also see it in your wallet if it supports displaying NFTs.
Security Tips
Always double-check URLs and avoid clicking on suspicious links to protect your wallet.
Consider using a hardware wallet for added security.
You’re now ready to explore the world of NFTs! Happy collecting!